Have you ever found yourself constantly switching between apps, staring at a digital to-do list, yet still feeling out of control? In a world ruled by taps and swipes, more and more people are choosing to return to pen and paper.
Using a paper planner is not an outdated habit. It is an intentional practice to reclaim control over your time and mental clarity. It can serve as your daily organizer, goal tracker, and productivity system all in one place.
If you have just picked up a brand-new notebook and feel intimidated by the blank pages, don’t worry. Today, we will break the process down into five simple, actionable steps. In this guide, you will learn how to use a paper planner that fits into your everyday routine.

What Is a Paper Planner?
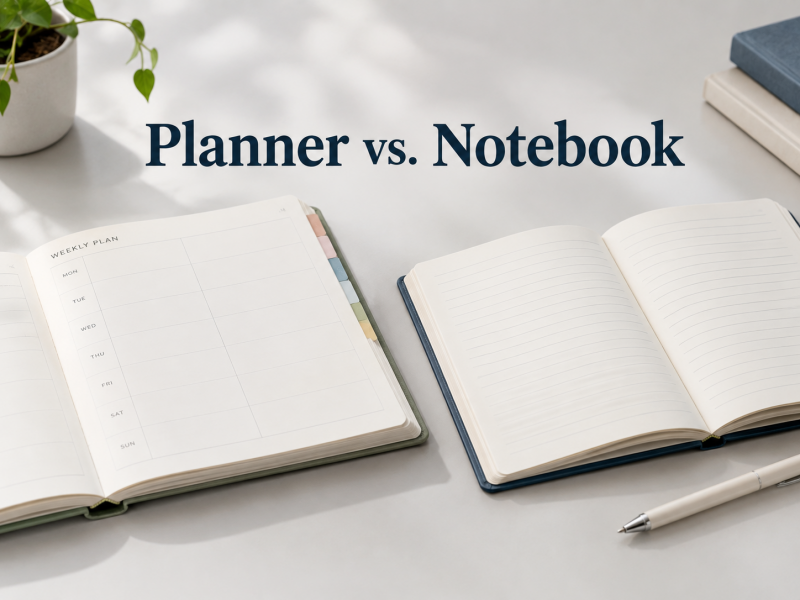
At its surface, a paper planner is a physical notebook designed to help you track your time. But it is much more than a simple calendar. Unlike standard notebooks with blank lines, a planner provides a structured framework. It translates the abstract concept of time into a visual layout you can touch, see, and manage. It holds your daily to-do lists and time blocks. Here, you filter out the noise and commit to your top priorities.
Why Paper Wins in a Digital Age
Why are paper planners growing in popularity despite smartphones and apps? The answer lies in the power of touch.
When you type a task into a phone, it disappears into a digital void the moment you close the screen. Even worse, digital calendars come with constant notifications that distract you. Writing by hand acts as a “Digital Detox.” It offers a screen-free space where you can focus without interruption.
Furthermore, handwriting stimulates your brain more than typing. Neuroscientists have found that writing by hand leads to sharper focus, better memory retention, and a deeper psychological commitment to your goals.
Ultimately, a paper planner is not a rigid system of rules designed to restrict your freedom. It is a flexible canvas designed to give you a blueprint for it.

How to Use a Paper Planner
Step 1: Choose the Right Layout for Your Lifestyle
The number one reason people abandon their planners within the first month is a mismatch of layouts. Before you put pen to paper, you need to choose the right framework. Think about how your brain naturally processes information. Then, select a system that matches your daily rhythm.
1. Match the Layout to Your Time View
- Monthly Layout: This style uses a large calendar grid across a two-page spread. It is best for minimalists, students, and strategic planners. Use it to track major deadlines, travel dates, and holidays. It is low pressure and simple to maintain.
- Weekly Layout: This style displays all seven days across a two-page spread. It is the most popular layout because it balances detail with simplicity.
- Daily Layout: This style gives a full, dedicated page to every single day. It offers massive writing space. It is ideal for busy professionals with packed schedules, heavy task loads, or people who like to write detailed daily diaries.
2. Choose Your Binding System
- Bound Journals (Fixed-Page): These are sewn or glued like a regular book. They are sleek, lightweight, and the edges do not dig into your hand while writing. They provide a nice sense of continuity and double as beautiful keepsakes on your shelf.
- Ring Binders (Organizers): These feature a cover with metal rings. The inner pages can be added, removed, or rearranged freely. This system gives you extreme flexibility to mix calendar layouts with budget trackers or blank notes.
- Bullet Journals (Dot Grid): These are completely blank notebooks with a faint dot pattern. There are no pre-printed dates or frames. You use a ruler and pen to draw your own personalized system from scratch.
3. Consider Size and Paper Quality
Do not overlook the physical details of your notebook. They can make or break your planning habit.
- Size Matters:
- A5 Size: The most common desk size. It offers a great balance of writing space and portability.
- A6 / Pocket Size: Palm-sized and lightweight. It slips easily into a small bag or pocket, making it perfect for taking notes on the go.
- B5 / A4 Size: Best for large, desk-based work and detailed project management.
- Paper Weight: The joy of planning is tied to the quality of your tools. Look for high-quality paper with a weight between 80g and 120g. Premium paper resists ink bleeding and ghosting. This ensures your writing feels buttery smooth, whether you use a fountain pen or a quick-drying gel pen.
Many beginners choose an overly complicated planner with dozens of specialized sections they never use. Don’t fall into this trap. A simple planner that fits your daily needs is always more effective than an elaborate system that is hard to maintain. The goal is not to find a perfect, flawless notebook. The goal is to find a tool that encourages consistent use and helps you stay organized every day.

Step 2: Set Up Your Planning System
Opening a brand-new planner with pristine pages can feel both exciting and intimidating. To overcome “blank-page paralysis,” remember one thing: your planner does not need to look like a perfect piece of art. It just needs to work for you. To keep your pages clean and organized, follow this simple four-step system.
1. Clear the Mental Clutter
Your brain is for thinking, not for storing information. Keeping scattered deadlines and ideas in your head causes anxiety. Before writing in your planner, find a blank notes page. Write down everything currently swirling in your mind. This includes deadlines, grocery lists, random ideas, and text messages you need to reply to. Getting everything onto paper instantly reduces mental fatigue. It gives you a clean slate to start organizing.
2. Funnel Your Time
Do not try to plan everything at once. Use a simple funnel principle to break down your tasks by time, layer by layer:
- Monthly View (The Big Picture): At the start of the month, log your “hard hurdles.” These are non-negotiable events with fixed dates, like exams, birthdays, meetings, and travel plans. Then, set just three core goals for the month.
- Weekly View (The Workflow): On Sunday evening, look at the week ahead. Break down your monthly goals into smaller, actionable steps. Distribute these tasks evenly across Monday through Friday based on your energy levels.
- Daily View (The Present Focus): Each morning, look at your daily page. Use the “Rule of 3” (or Three Frogs Rule). Pick exactly three vital tasks you must finish today. Circle them. If you complete these three things, your day is a success. List minor chores, like replying to casual emails, below them as secondary tasks.
3. Use a Minimalist Symbol Key
Paper planners lack digital pop-up alerts. To track your progress at a glance without creating a messy page, use these simple symbols inside your daily list:
•Task: A basic to-do item.XCompleted: Cross it out by hand when done. This brings a huge sense of satisfaction.>Migrated: If you did not finish a task today, draw an arrow through it and move it to tomorrow.○Event: A meeting, appointment, or hard deadline.!Priority: Put this next to your top three daily tasks to make them pop off the page.
Keep it minimal. Start with just one high-quality black or blue pen. Let the system become a habit before you add colored markers or decorations.
4. Close the Loop
A planning system only works if you keep it alive. Build your system around two quick daily micro-habits:
- The Morning 5-Minute Review: Open your planner while drinking your morning coffee. Review yesterday’s leftover tasks, confirm today’s top three priorities, and set your course for the day.
- The Evening 10-Minute Wrap-Up: Before bed, open your planner and close your laptop. Mark your completed tasks and migrate unfinished items to tomorrow. Use a small blank space to write down one highlight or win from the day.
Physically closing your planner signals to your brain that today’s work is officially done. Now you can rest easy.

Step 3: Master Task Management & Prioritization
A paper planner is only as effective as the logic behind it. If you write down 20 tasks for a single day and treat them all with the same urgency, your planner becomes a “wish list with no limits.” This quickly turns a tool of clarity into a major source of stress.
To take control of your schedule, you must learn to filter, categorize, and prioritize your workload directly on the page. Here are three lean task-management models designed specifically for paper notebooks.
Do not waste space by drawing complex coordinate grids on your pages. Instead, use a quick letter system to tag your tasks:
- A – Critical & Urgent (Do): Tough tasks with hard deadlines today. Handle these first.
- B – Important but Not Urgent (Schedule): Activities that drive your long-term growth. However, there is no specific deadline.
- C – Urgent but Not Important (Delegate): Tasks that must be completed but do not require you to have specific skills.
- D – Neither (Delete): Busywork that drains your energy. Cross these out ruthlessly.
2. The “1 + 3 + 5” Rule for Total Volume Control
If your daily list still feels crowded, force yourself to use strict volume control. Limit your daily tasks to a maximum of nine items:
- 1 Major Task: Your most critical and mentally demanding project for the day. If you finish this, your day is a success.
- 3 Medium Tasks: Routine work items that take 30 to 60 minutes each.
- 5 Small Tasks: Low-effort chores, like watering plants or filing receipts.
By limiting your list to this physical space, you force yourself to say no to distractions.
3. Time-Blocking and Task Batching
A to-do list without a designated time slot is often just a wish list. To fix this, separate your appointments from your tasks:
- Appointments happen at a specific time. Log these first to see your fixed boundaries.
- Tasks can happen anytime. Look at the empty spaces in your daily column and draw a physical box around a chunk of time. Dedicate that block to one task, such as a 90-minute block for deep work.
- Batching: Use your page margins to group similar, low-energy tasks together. Dedicate one “Admin Hour” to knock out all your phone calls and emails in one go. This keeps your main calendar clean.

Step 4: Review and Adjust Your Planner Regularly
A paper planner is not just a tool for predicting the future. It is a mirror for reflecting on the past. The most common reason people stop planning is not a lack of time. It happens because they treat their planner as a rigid script instead of a living, dynamic document.
To keep your system running effortlessly all year long, you must review and adjust your pages. By dedicating just a few minutes to reflection, your planner evolves from a basic calendar into a powerful tool for personal growth.
1. Build a Simple Review Routine
You do not need to write lengthy essays to check your progress. Divide your reflection into three quick, manageable routines:
- The Daily Check-In: Every morning, open your planner to set your daily intentions and lock in your top three tasks. Every evening, spend five minutes closing the loop. Physically cross off completed items. If a task is unfinished, draw a migration arrow (
>) and move it to tomorrow. - The Weekly Reset: On Sunday evening, look back at the past seven days.
- Achievements: What major tasks did you finish? Circle them to give yourself positive feedback.
- Obstacles: Which tasks were repeatedly postponed? Why did they stall?
- Remove: What activities wasted your time without adding value? Drop them next week.
- Reset: What adjustments do you need to make to next week’s schedule?
- The Monthly Course Correction: At the end of the month, look at your Habit Tracker. If your success rate for a habit is below 40%, do not beat yourself up. This is just an objective signal from your system that your goal is too ambitious. Lower the bar for next month. If a habit is too hard, track it three times a week instead of every day.
2. Learn from Your Unfinished Tasks
Everyone has tasks that carry over to the next page. Handwriting forces you to face these delays. If you find yourself manually rewriting the same task for days, stop and ask yourself why. Is the task truly a priority? Is the workload unrealistic? Do you need to break it down into smaller, easier steps? Identifying the cause helps you create more realistic plans in the future.
3. Embrace Imperfection and White Space
As you look over your pages, you will inevitably encounter two things that trigger “planner guilt”: mistakes and blank spots. Here is how to reframe them:
- Embrace the Scratch-Out: Crossed-out words, messy arrows, and white-out tape are not failures. They are proof of a real, active life. A messy planner means you are successfully adapting to a changing reality.
- The Power of White Space: If you see an empty day or a blank block, resist the urge to fill it. White space is not wasted space. It is breathing room. It represents time for rest, spontaneous ideas, or a vital buffer for when life throws you a curveball.
Your planner is there to serve you, not to rule you. If you go on vacation or get sick and leave your planner blank for a week, that is a victory of living in the moment. Your system has not failed.
Do not waste time trying to go back and fill in what you missed. Simply stick a favorite sticker on the blank page, write a note like “I took a great rest!” and start fresh from today’s page. Continuous improvement, not perfection, is the secret to long-term success.

Step 5: Build a Consistent Planning Habit
The ultimate goal of a paper planner is to turn efficient behaviors from a deliberate effort into automatic muscle memory. Consistency is the real magic. A planner will not improve your life if it sits unused on a shelf. Cultivating habits in a physical book offers excellent visual feedback compared to a cold mobile app. Use these three behavioral psychology strategies to make your planning habit stick for good.
1. Practice “Habit Stacking”
It is hard to build a new habit from scratch. Instead, anchor your planner use to a non-negotiable routine you already do every single day. This strategy is called habit stacking. When you tie your notebook to an existing anchor event, your success rate skyrockets.
Use this simple formula: “After [existing habit], I will [use my planner].”
- Morning Routine: “After I pour my morning cup of coffee, I will immediately open my planner and choose my top three tasks.”
- Evening Routine: “After I shut down my laptop at the end of the workday, I will spend three minutes reviewing tomorrow’s schedule.”
2. Keep It Visually Frictionless
Out of sight, out of mind. If your planner is buried in a backpack, tucked away in a drawer, or hidden under loose papers, you will forget to use it. Eliminate all physical friction to train your brain.
- Keep your planner open on your desk right next to your keyboard during the day.
- Leave your favorite pen resting right inside the binding.
- If you travel, make sliding your planner into your bag the very first thing you pack.
Make your planner a permanent, beautiful fixture of your workspace. The more you see it, the more you will use it.
3. Lower the Barrier
When motivation is high, we tend to overcomplicate things. We try to track tasks all at once. This leads to burnout. If you are a beginner, strip the system down to a “no-brainer” version that takes less than two minutes.
Instead of tracking an hour of exercise, give yourself a checkmark just for putting on your sneakers. Lower the bar so it is impossible to fail. Once the physical act of opening your notebook becomes a habit, you can naturally layer in more detailed tracking.

Conclusion
Ultimately, a paper planner is a beautiful paradox. It is an analog tool that makes you vastly more effective in a digital world. It does not demand your attention with buzzing alerts, sell your data, or drain your battery. It simply sits quietly on your desk, waiting for you to define your day.
There is no “perfect” way to use a paper planner. There is only your way. Consistency matters much more than flawless pages. Even spending just five minutes a day with your notebook can significantly improve your focus and reduce mental clutter.
So, step away from the digital current. Clear a small space on your desk, pour yourself a fresh cup of coffee, and feel the texture of a brand-new page. Grab your favorite pen, write down today’s date, and take your first step toward a more focused, peaceful, and meaningful life.
Ready to Begin Your Journey?
Every great story deserves a beautiful canvas. Whether you are a minimalist seeking a crisp weekly overview or a daily journaler looking for premium, fountain-pen-friendly paper, we have designed the perfect planner for your daily rhythm.
Explore our signature planner collection to find the layout, color, and size that speaks to your unique style.